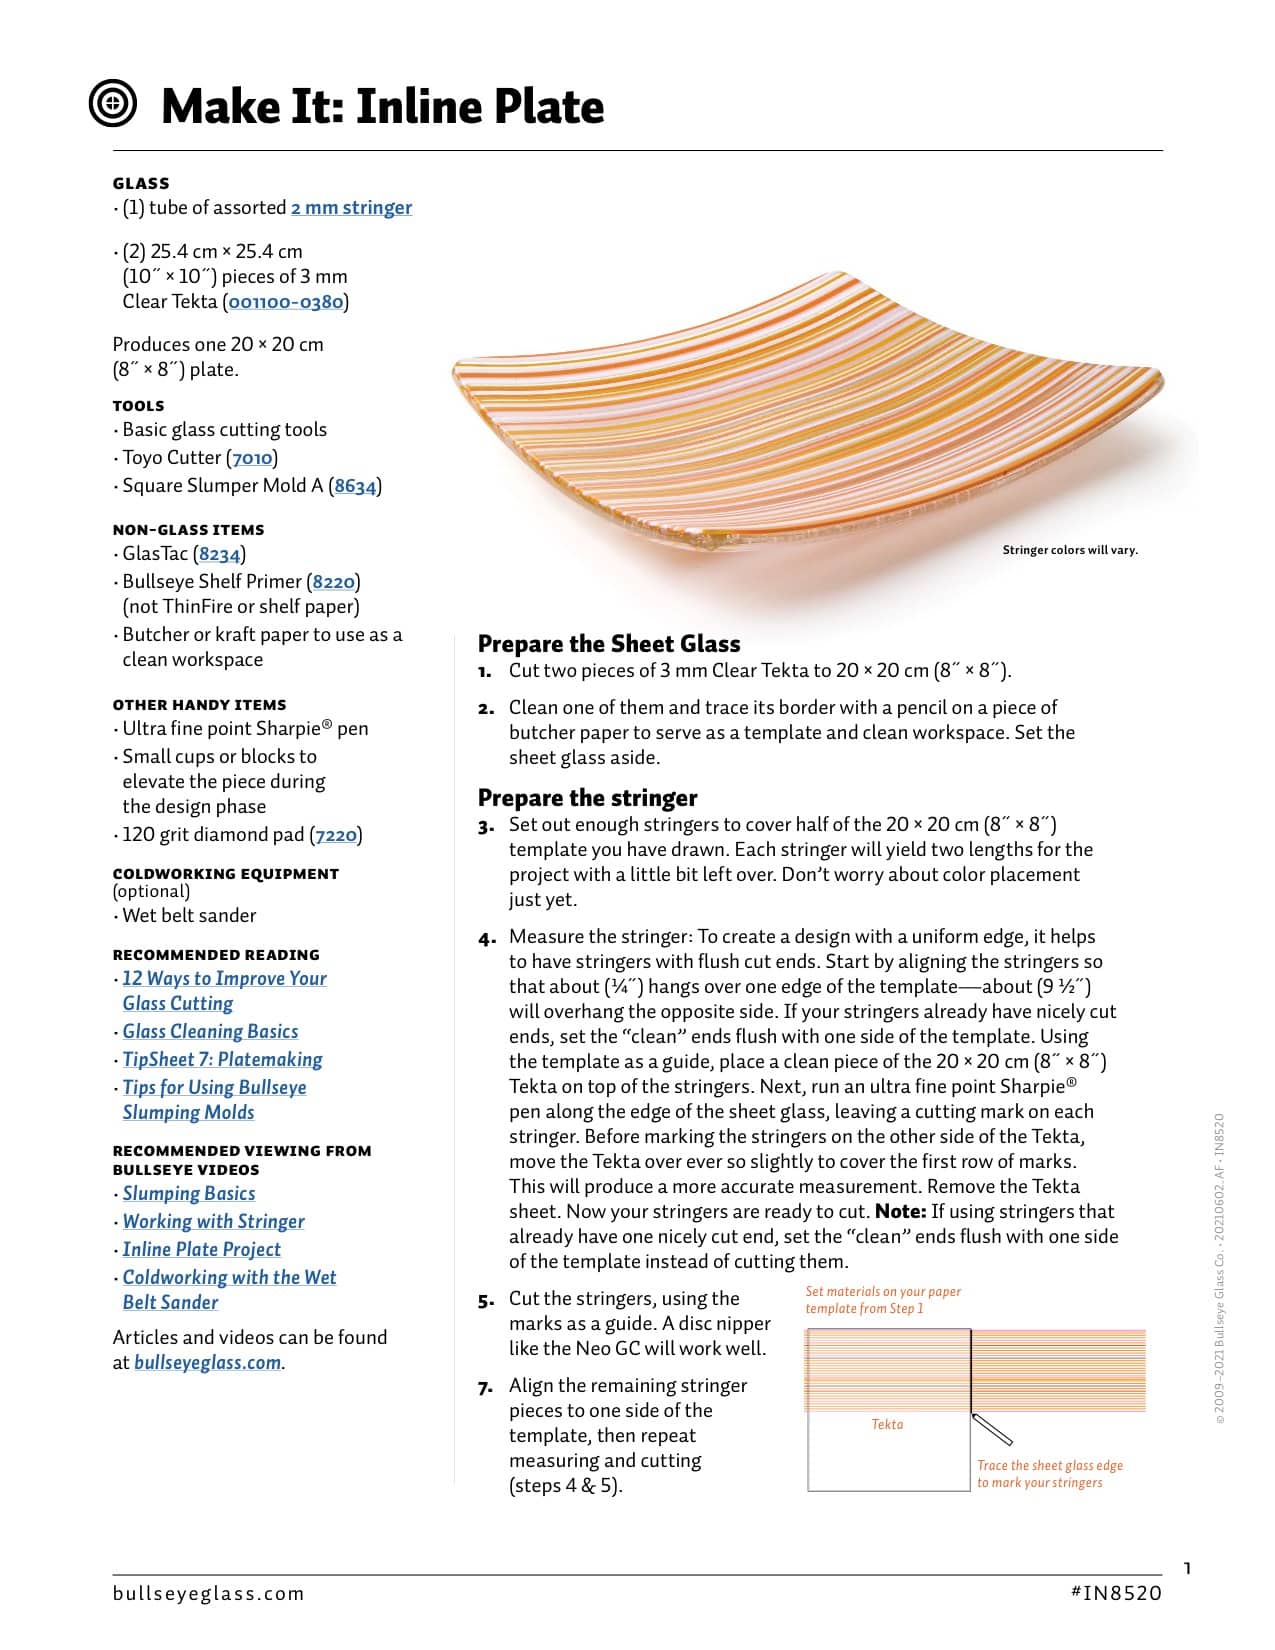
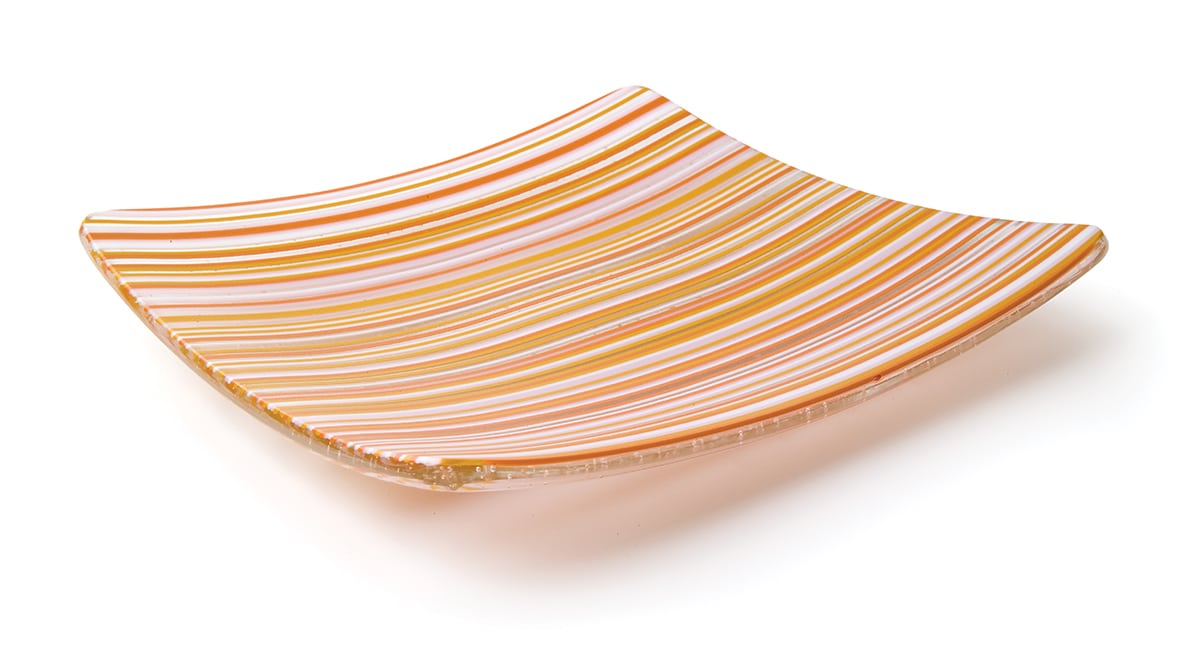
Bold designs using just stringer and clear sheet glass!
Prepare the Sheet Glass
- Cut two pieces of 3 mm Clear Tekta to 20 × 20 cm (8˝ × 8˝).
- Clean one of them and trace its border with a pencil on a piece of butcher paper to serve as a template and clean workspace. Set the sheet glass aside.
Prepare the Stringer
- Set out enough stringers to cover half of the 20 × 20 cm (8˝ × 8˝) template you have drawn. Each stringer will yield two lengths for the project with a little bit left over. Don’t worry about color placement just yet.
- Measure the stringer: To create a design with a uniform edge, it helps to have stringers with flush cut ends. Start by aligning the stringers so that about (¼˝) hangs over one edge of the template—about (9 ½˝)
will overhang the opposite side. If your stringers already have nicely cut ends, set the “clean” ends flush with one side of the template. Using the template as a guide, place a clean piece of the 20 × 20 cm (8˝ × 8˝) Tekta on top of the stringers. Next, run an ultra fine point Sharpie® pen along the edge of the sheet glass, leaving a cutting mark on each stringer. Before marking the stringers on the other side of the Tekta, move the Tekta over ever so slightly to cover the first row of marks. This will produce a more accurate measurement. Remove the Tekta sheet. Now your stringers are ready to cut. Note: If using stringers that already have one nicely cut end, set the “clean” ends flush with one side of the template instead of cutting them. - Cut the stringers, using the marks as a guide. A disc nipper like the Neo GC will work well.
- Align the remaining stringer pieces to one side of the template, then repeat measuring and cutting (steps 4 & 5).
Download the article to complete the project.