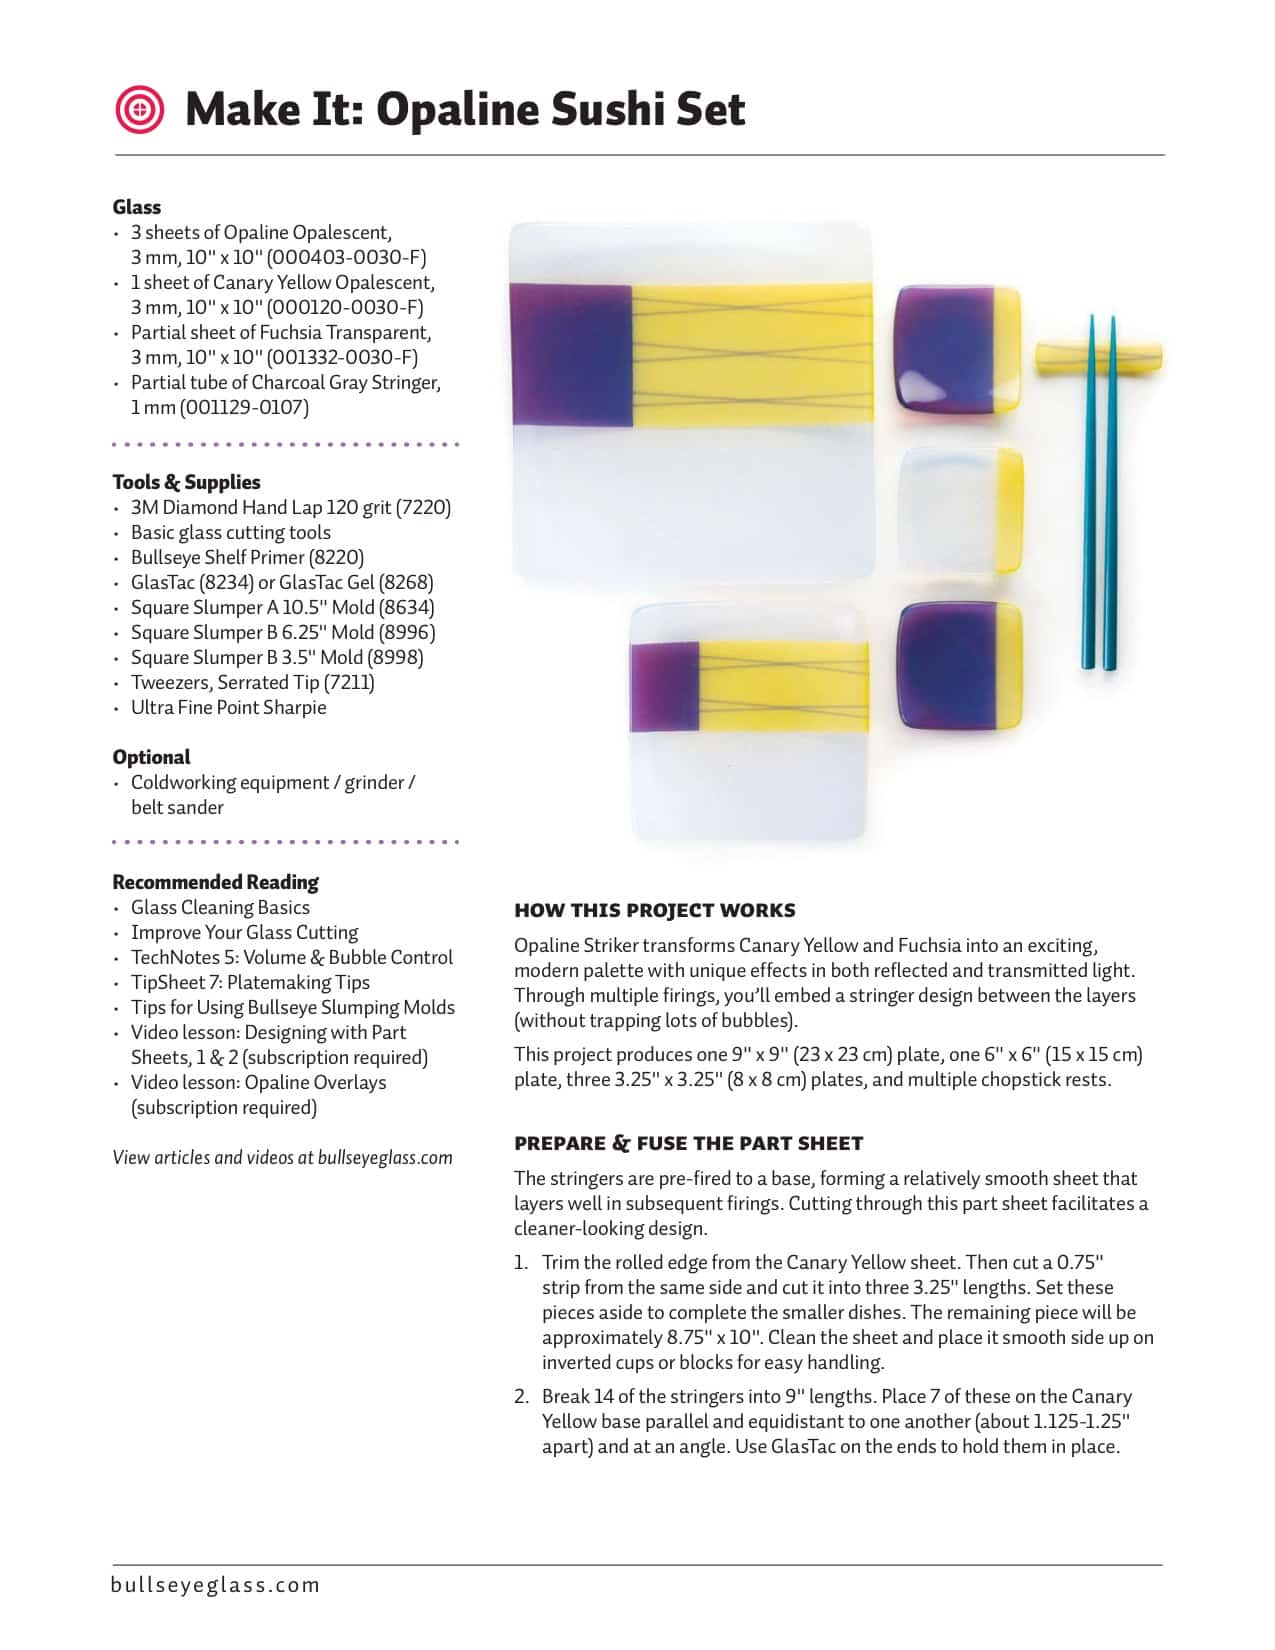
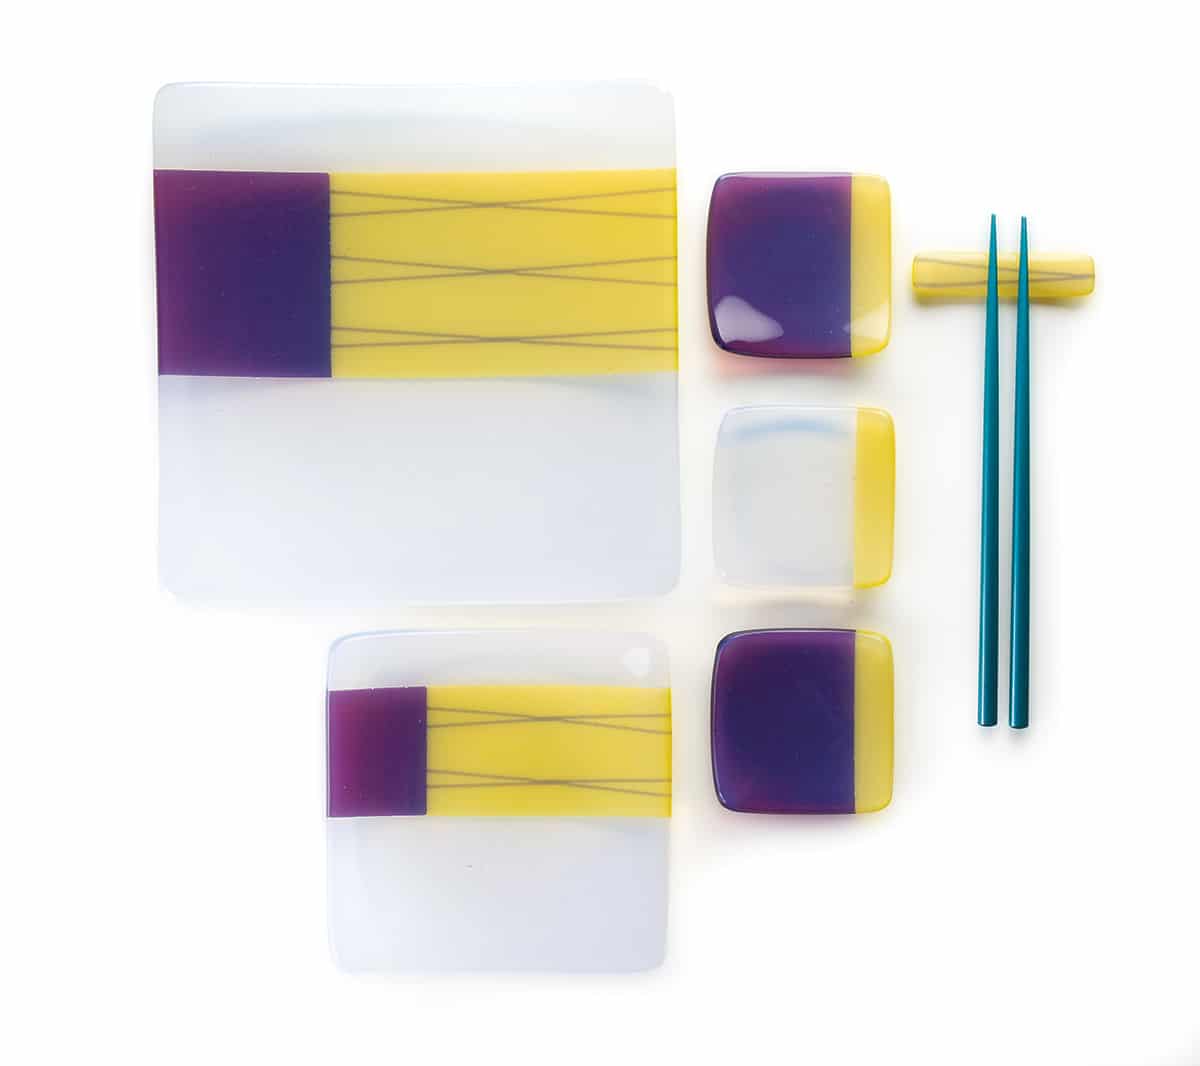
Wow your friends and showcase your favorite bites with this luminescent set.
How this project Works
Opaline Striker transforms Canary Yellow and Fuchsia into an exciting, modern palette with unique effects in both reflected and transmitted light. Through multiple firings, you’ll embed a stringer design between the layers (without trapping lots of bubbles).
This project produces one 9˝ × 9˝ (23 × 23 cm) plate, one 6˝ × 6˝ (15 × 15 cm) plate, three 3.25˝ × 3.25˝ (8 × 8 cm) plates, and multiple chopstick rests.
Prepare & Fuse the part Sheet
The stringers are pre-fired to a base, forming a relatively smooth sheet that layers well in subsequent firings. Cutting through this part sheet facilitates a cleaner looking design.
- Trim the rolled edge from the Canary Yellow sheet. Then cut a 0.75˝ strip from the same side and cut it into three 3.25˝ lengths. Set these pieces aside to complete the smaller dishes. The remaining piece will be approximately 8.75˝ × 10˝. Clean the sheet and place it smooth side up on inverted cups or blocks for easy handling.
- Break 14 of the stringers into 9˝ lengths. Place 7 of these on the Canary Yellow base parallel and equidistant to one another (about 1.125–1.25˝ apart) and at an angle. Use GlasTac on the ends to hold them in place.
- Place the remaining 7 stringers across the first layer at the opposing angle, forming a wide X with intersections along the center of the sheet. Apply GlasTac where the stringers touch the sheet and at the center of the X.
- Once the GlasTac is set, transfer the piece to a prepared firing surface. We recommend a primed kilnshelf because the edges of the sheet will pull in as the material responds to the heat.
Download the article to complete the project.