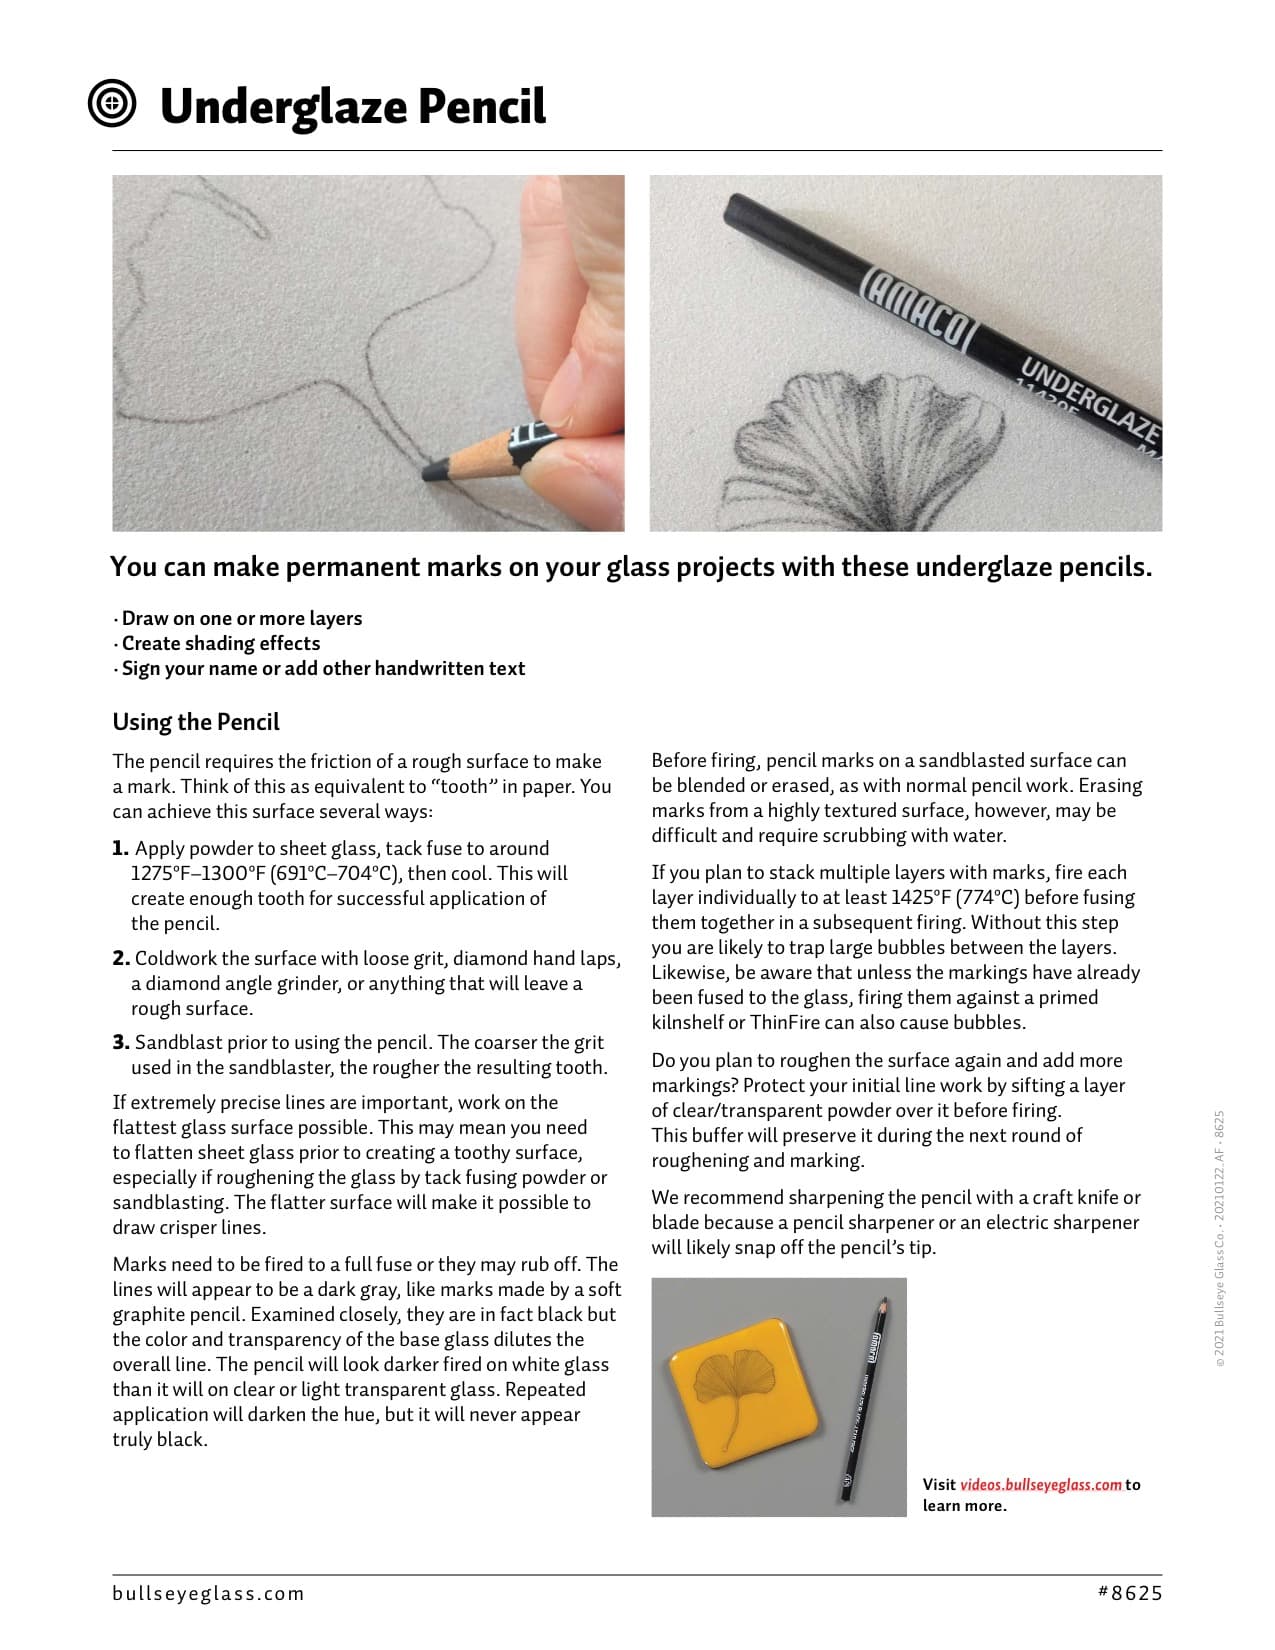
You can make permanent marks on your glass projects with these underglaze pencils.
- Draw on one or more layers
- Create shading effects
- Sign your name or add other handwritten text
Using the Pencil
The pencil requires the friction of a rough surface to make a mark. Think of this as equivalent to “tooth” in paper. You can achieve this surface several ways:
- Apply powder to sheet glass, tack fuse to around 1275ºF–1300ºF (691ºC–704ºC), then cool. This will create enough tooth for successful application of the pencil.
- Coldwork the surface with loose grit, diamond hand laps, a diamond angle grinder, or anything that will leave a
rough surface. - Sandblast prior to using the pencil. The coarser the grit used in the sandblaster, the rougher the resulting tooth.
If extremely precise lines are important, work on the flattest glass surface possible. This may mean you need to flatten sheet glass prior to creating a toothy surface, especially if roughening the glass by tack fusing powder or sandblasting. The flatter surface will make it possible to draw crisper lines.
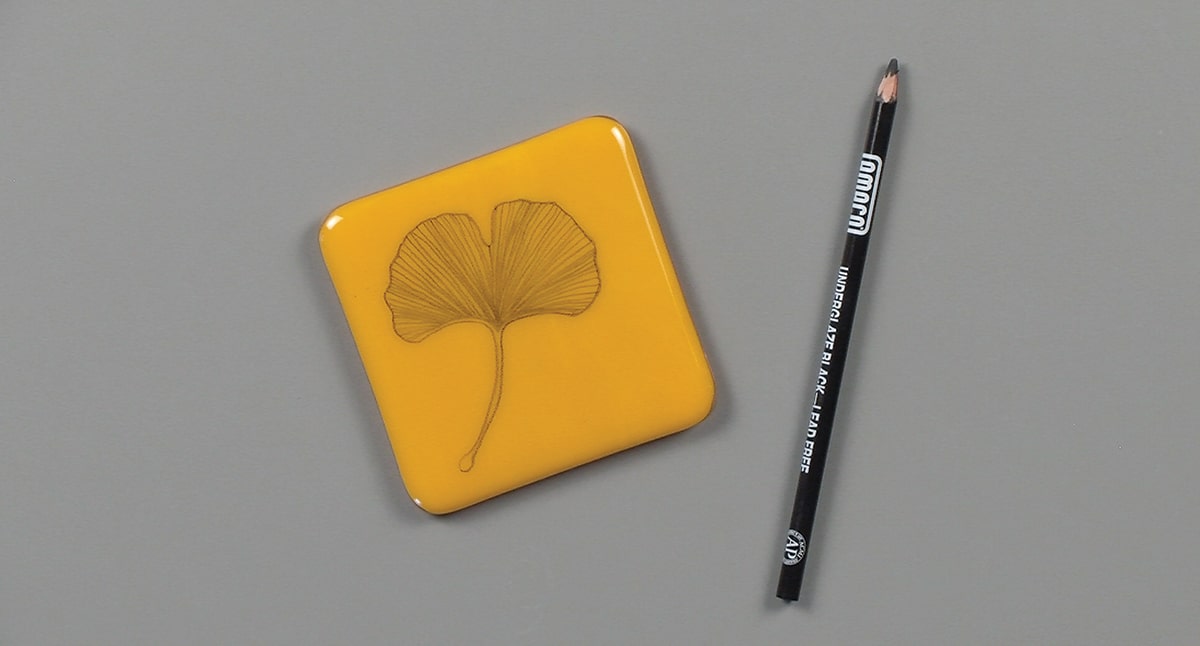
Marks need to be fired to a full fuse or they may rub off. The lines will appear to be a dark gray, like marks made by a soft graphite pencil. Examined closely, they are in fact black but the color and transparency of the base glass dilutes the overall line. The pencil will look darker fired on white glass than it will on clear or light transparent glass. Repeated application will darken the hue, but it will never appear truly black.
Before firing, pencil marks on a sandblasted surface can be blended or erased, as with normal pencil work. Erasing marks from a highly textured surface, however, may be difficult and require scrubbing with water.
If you plan to stack multiple layers with marks, fire each layer individually to at least 1425ºF (774ºC) before fusing them together in a subsequent firing. Without this step you are likely to trap large bubbles between the layers.
Likewise, be aware that unless the markings have already been fused to the glass, firing them against a primed kilnshelf or ThinFire can also cause bubbles.
Do you plan to roughen the surface again and add more markings? Protect your initial line work by sifting a layer of clear/transparent powder over it before firing. This buffer will preserve it during the next round of roughening and marking.
We recommend sharpening the pencil with a craft knife or blade because a pencil sharpener or an electric sharpener will likely snap off the pencil’s tip.